Record your first test
Start recording#
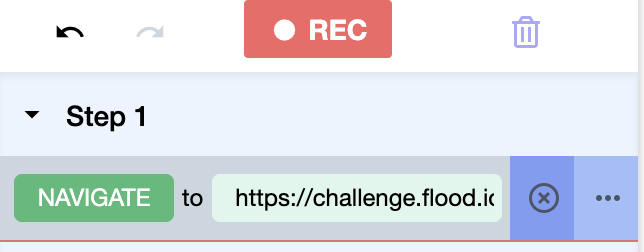
Once launched, click the REC button to start recording. The first action - NAVIGATE to the page - is created to get you started. Then just interact with the page, and each of your actions will be recorded in the Recorder.
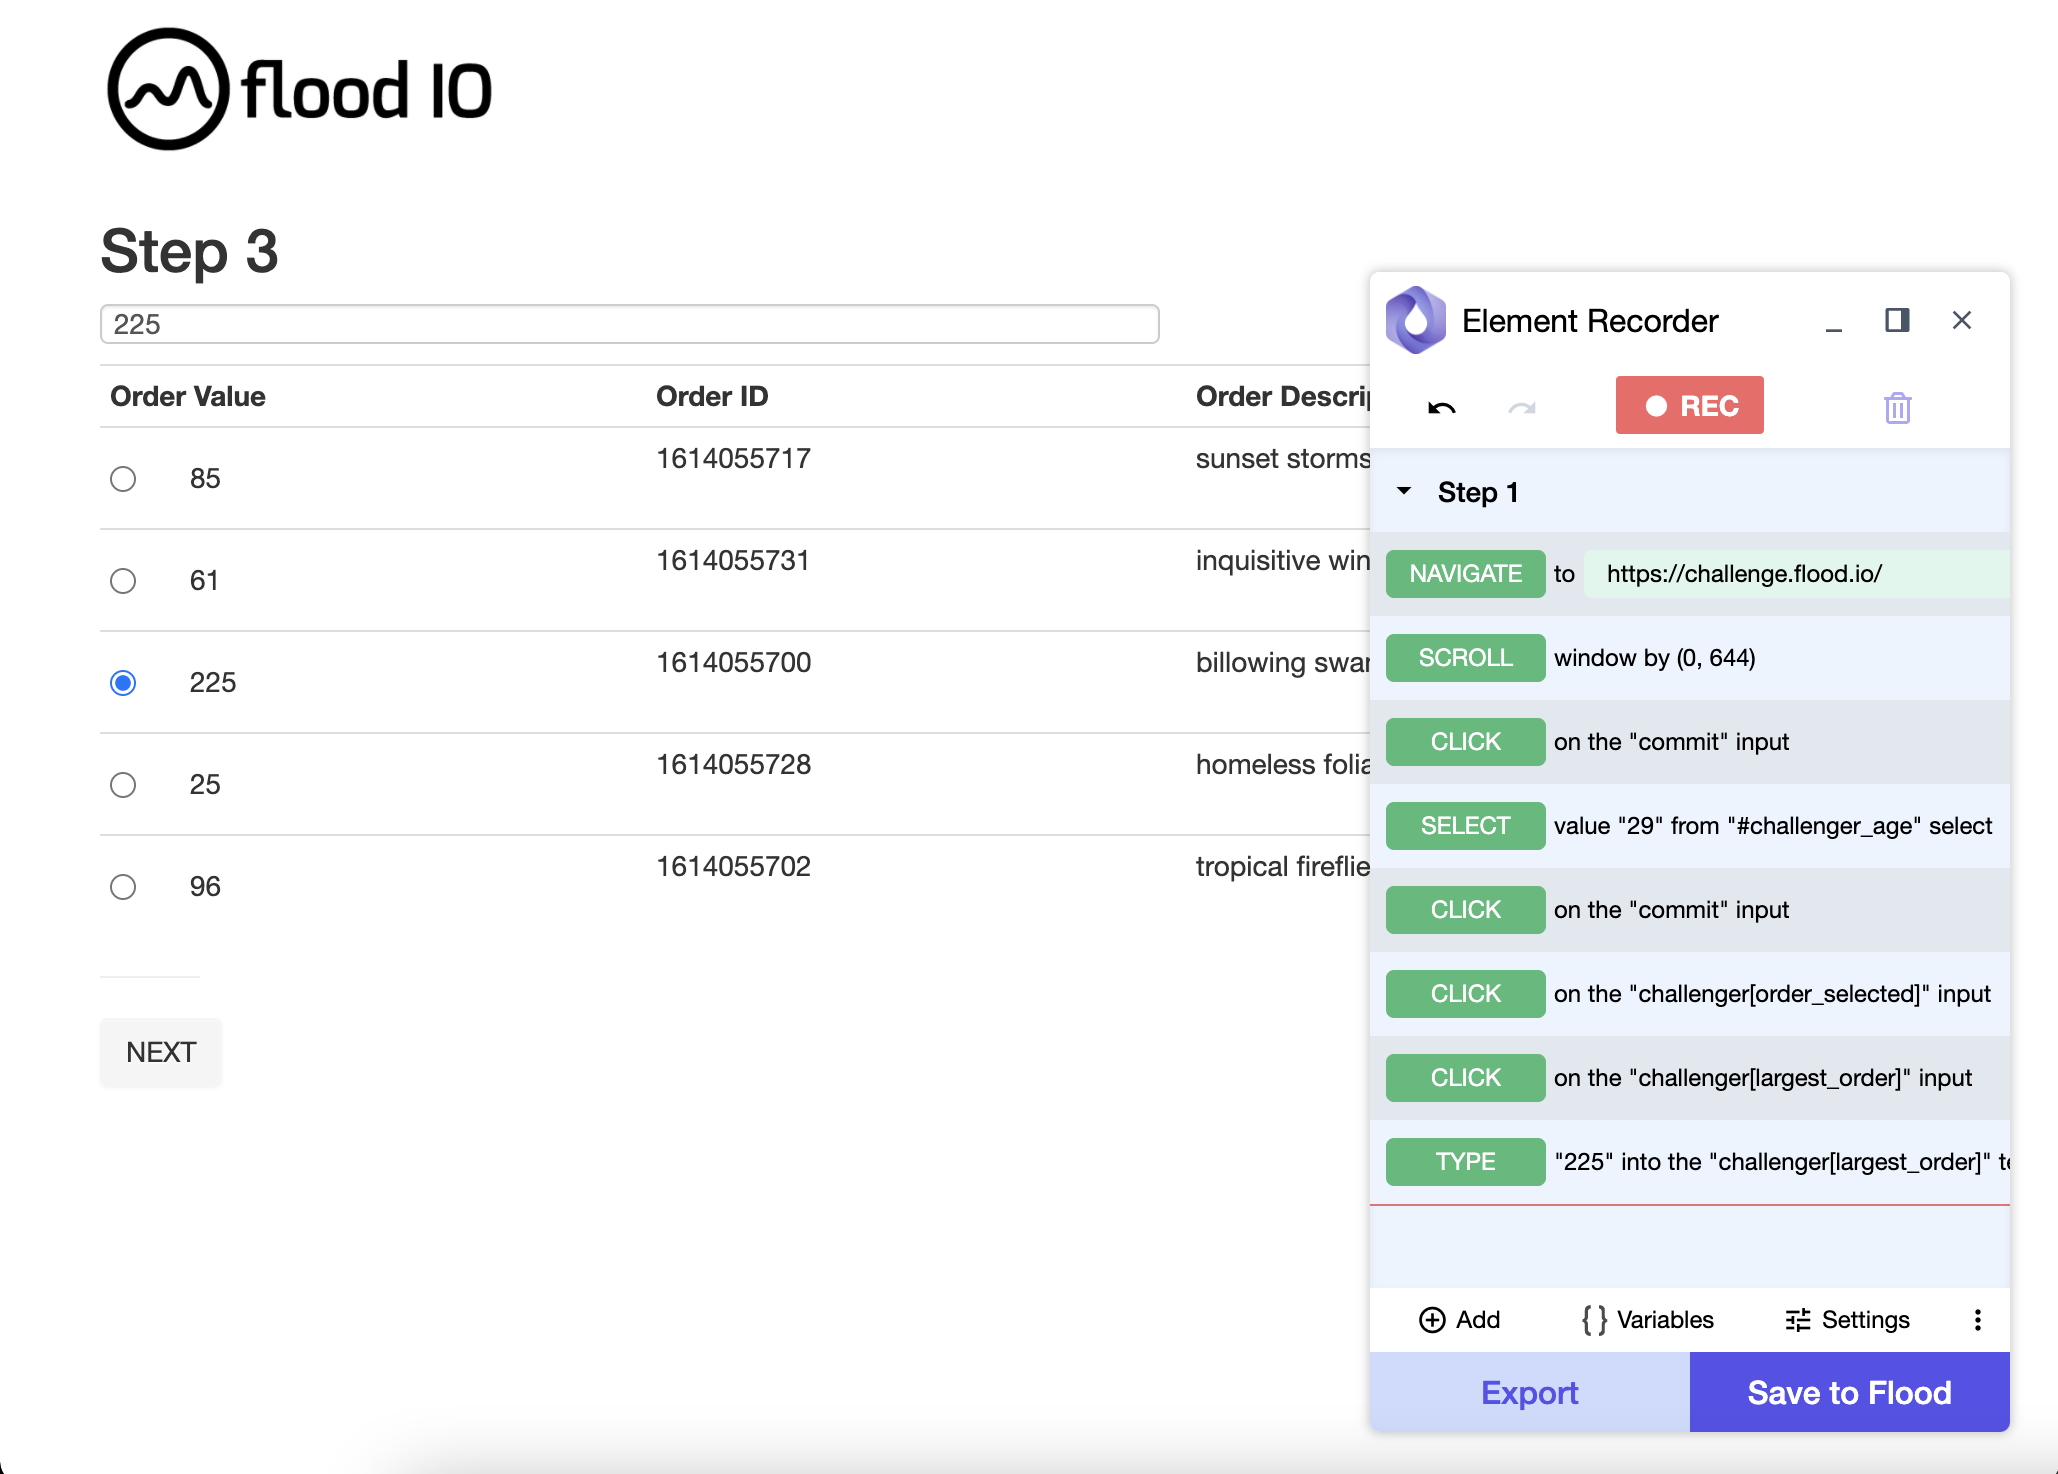
To pause or resume recording, click the REC button again.
Organize your test#
A test scenario may be divided into many steps. Each step contains a set of actions. An action is basically an interaction you made on the page.
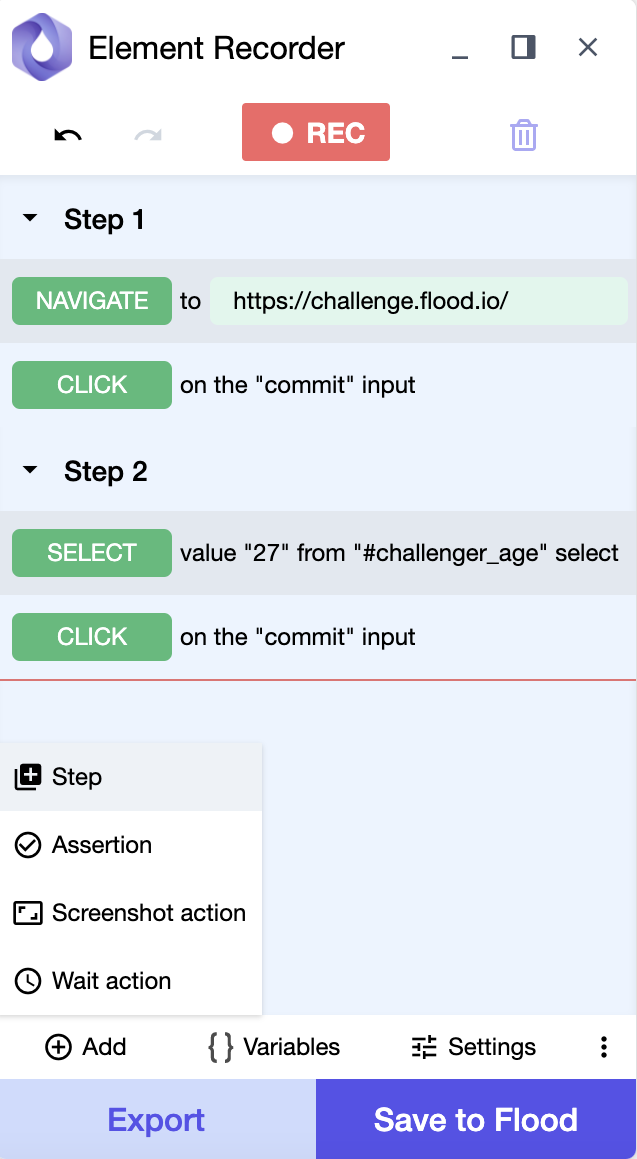
When you start recording, Step 1 is automatically created and contains all of your interactions with the page. You can add more steps while recording so that your interactions are grouped into steps.
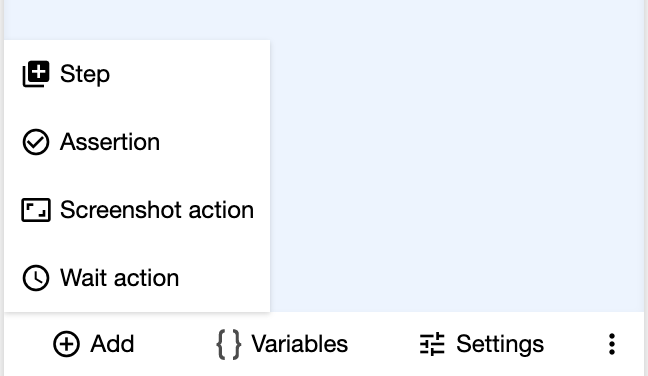
To add a new step, click Add > Step, then continue to interact with the page. The actions recorded from here will belong to this step.
To rename or delete a step, hover on a step and click Rename step or Delete step.
Modify your test#
Edit an action#
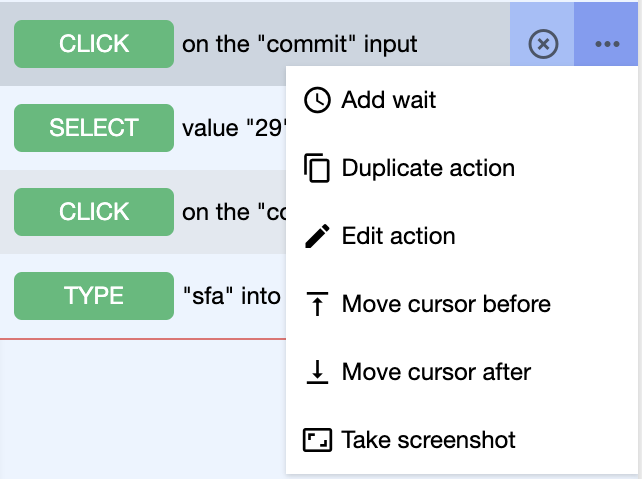
During recording, if you'd like to make an adjustment on a recorded action, hover on the action, then click the ... icon > Edit action. Edit action screen will appear.
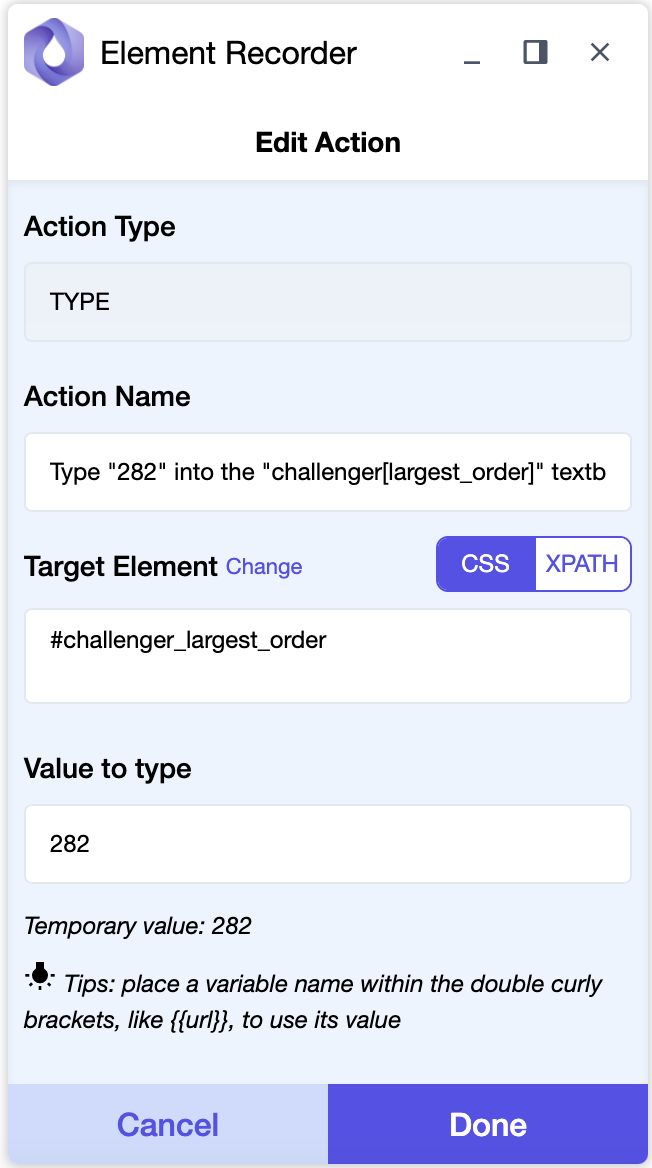
Depending on the action you're editing, you will be presented with different fields to edit, including:
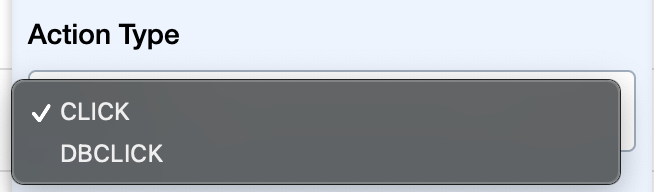
Action type
Allows you to switch between applicable action types (e.g., change from
CLICKtoDBCLICK).Applicable for all actions, only editable in some actions. See more.
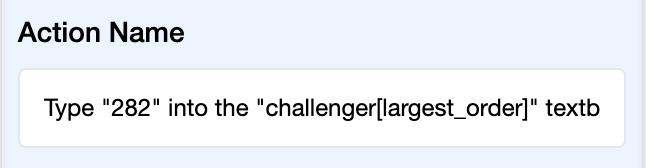
Action name
Auto-generated based on the Action type and its Target element and will be automatically re-generated if these fields get updated.
You can manually update the field, but it won't be automatically re-generated in the future.
Applicable and editable for all actions.
Action-specific fields
Target element
Allows you to change the target element of the action.
To change the target element, click
Change, then hover on the page. There will be a purple box indicating the element you're about to choose. Click on the element to select.You can also change the target element by manually enter the new selector into the field.
Supports switching between
CSSandXPATHselector. By default, elements are selected using theCSSselector. You can change this in the Recorder settings.Not applicable for some actions, editable. See more.

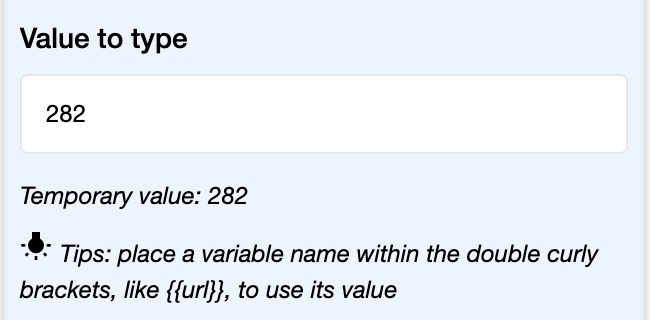
Value fields
An action may have or may not have value fields. Each of the actions with values has a different set of value fields applicable for that particular action. For example, the CLICK action doesn't have a value, the TYPE action has 'Value to type', while the RESIZE action has 'Viewport width' and 'Viewport height'. See more.
You can use variables to make up a value.
Note that while you're editing an action, the Recorder will not record your actions on the page. Once done editing, click Done to save the changes or Cancel to discard, then continue recording.
For the NAVIGATE action, you can directly edit the URL on the Recording screen.
Insert actions#
To insert some actions before or after a recorded action:
- Hover on the action, then click the
...icon >Move cursor beforeorMove cursor after. The red line (aka the cursor) will be moved to the corresponding position.
{' '}
- Continue to interact with the page to record actions at the current cursor position.
Duplicate an action#
If you'd like to add another action similar to an existing action, you may want to duplicate the action and edit from there.
To duplicate an action, hover on the action, then click the ... icon > Duplicate action. A duplicate action will be created right after this action.
{' '}
Move an action#
You can move a recorded action up/down or to another step by drag-and-drop the action on the Recording screen.
Undo - Redo - Delete actions#
To undo or redo recorded actions by clicking the icons on the top-left of the Recorder.
To delete an action, hover on the action, then click the
xicon.To delete all recorded action, click the icon on the top-right of the Recorder.
Add take screenshot#
Capture the page's screenshot after an action is executed might be helpful in some situations, especially after an assertion.
There are two ways to add a take-screenshot action:
- Hover on an action, then click
...icon >Take screenshotto add a take-screenshot action after this action.
{' '}
or
- Click
Add>Screenshot actionto add a take-screenshot action at the cursor position.
{' '}
Add wait#
Wait is essentially a pause before executing the next action. By default, there are already implicit waits configured at waitUntil setting. You can also add additional explicit waits to suit your needs.
There are two ways to add a wait:
- Hover on an action, then click the
...icon >Add waitto add a wait after this action.
{' '}
or
- Click
Add>Wait actionto add a wait at the cursor position.
{' '}
A WAIT action will be added, and you can edit the duration to wait.

info
If you'd like to add the same wait duration after each and every action (or step), you can configure it in Recorder settings.
Now you know how to record and modify a basic test scenario. To learn how to make more advanced test scenarios, navigate to our guides on the left column.